 |
| "Right boys! Just run up that slope, over the wolf pits, through the canister from six 12 pounders, over the palisade then beat up those 18 stone Russian gunners and hold it against all counter attacks! Follow me, Vive!" |
No recreation of this battle would be complete without the Grand Redoubt, Great Redoubt or Raevsky Redoubt - take your pick of names. In truth this was not much more than a hasty earthwork with timber torn from local houses in Semenovskaya. (The poor villagers were evicted and the houses pulled down to build redoubts and to offer clear lanes of fire; Imperial Russia didn't have a Planning Department Consultation Process it seems!) The exact nature of the Great Redoubt is debatable - this is not what I want this blog to be about! Accounts vary even as to whether it had a back or not let alone the shape etc. So this is going to be MY Great Redoubt!
Here is the brief I gave myself;
We need something which can hold 6 Russian 12lb guns or a 32/36 strong battalion.
It cannot be too big, yet must still look imposing!
We need obvious front, flank and rear arcs for fire and charges etc.
It should have some height of its own.
Look pretty yet be functional.
We want wolf pits in front of it!
It should not look like a Vauban star fort with gabions etc.
With the above in mind I made some initial compromises. The first thing to go was the slightly arrowhead shape of the front. This looked good but messes up gun bases and fire arcs in game terms. Next I dispensed with the back. Two reasons for this; firstly we can always put a few twigs down as a rear barricade if we need one. Secondly, in pure game turns it is more exciting to have a battle to outflank the thing and get in the back - options, good to have options! It also means holding onto it once captured is harder - therefore the battle see-saws for possession.
So, what I am building is "My Big Redoubt" ! not a replica of Raevsky's. We'll use it in our Borodino re-fight and maybe others too. What a fudge.
 |
| Some of the materials. |
For the base I selected a large table mat from the dining room; a wedding present with great sentimental value to Mrs warpaintjj. No not really, I picked up 10 huge table mats for from a charity shop, no one could confirm the price so I took them. Table mats are very sturdy and heavy. I use them for all my villages and some field complexes. Next I nicked some polystyrene from my neighbour's skip, the same one I stole the ladder from in my last post, actually his wife is Russian so I am sure she would support the cause. Some wooden coffee stirrers liberated from a ghastly American coffee chain. Some balsa wood was found in the kids craft draw with PVA and filler. I checked my pots of grit and sand, no need to pinch anymore from the beach or building sites. Stanley knife - the carpet fitters left this behind with spare blades - muppets.
The silver spoon I was born with - in my mouth!
The flock I had to actually buy with real money, scandalous - rip off Britain - makes you sick!
Now with a clear conscience I could begin my task.
The polystyrene was cut into the correct shapes to create the basic core shape of the mound & wolf pits. Messy work. These were then glued down and left for about 48 hours with heavy books on top.
 |
| The core shape with balsa "gun deck". |
 |
| Same stage with a gun battery and some figures for scale. |
The next stage was to apply filler to the areas I wanted to be slopes. Once again I was careful to not overdo this - more thin applications than one big dollop! I left each layer to dry for at least 24 hours. This took no time really, about 5 minutes each night until I was happy. At some point I decided to add better planking to the sides and build up the front a little too. This was done with bits of wooden coffee stirrers snapped to suitable lengths and glued into place. They also have more texture than balsa wood.
 |
| Layers of filler were applied over 3 or 4 nights until the slopes pleased me. |
 |
| These are poor photos. |
 |
| This is starting to look like it might work now. |
 |
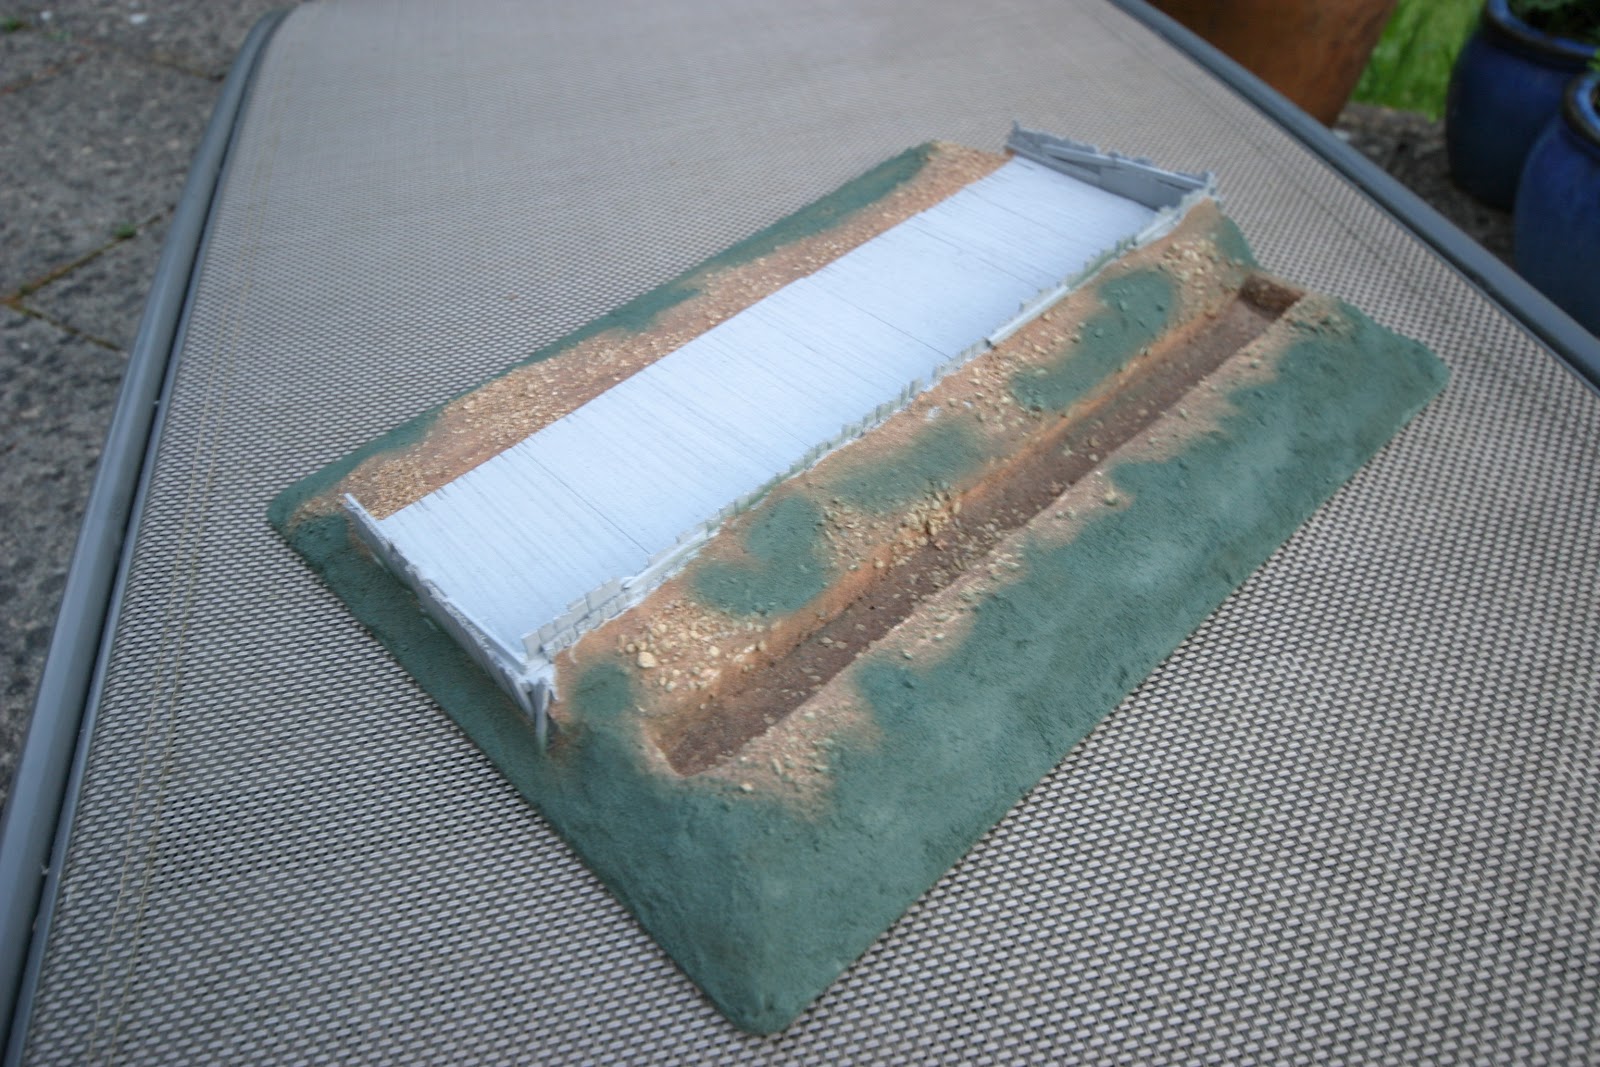
| Wood work sprayed gray - grit and sand applied. |
 |
| The inside of the redoubt, note the hasty plank defenses shoring up the earthworks. |
 |
| I could almost stop here - I've played with far worse scenery! |
 |
| This is beginning to look like a formidable position. |
 |
| All this digging redoubts is thirsty work. "Hello Mr Ice Cold Beer! - Good bye Mr Ice Cold Beer!" |
Time to get my dry brushing hat on.
Using a very old brush, a nice broad soft one, I applied quite a heavy coat of Citadel's Bleached Bone, silly names aside I have used this to highlight all kinds of things and lots of different base colours too. In this case it went straight over the browns, the gray and the green. Next was a layer of Pale Flesh by Miniature Paints. Silly names aside this is an off white rather like the cream on top of the milk, slightly yellowy, the texture is more like cream that milk as well. This layer was dry brushed over everything as well. Finally, and somewhat heretically, I gave the ground work the faintest dusting of white; this really picks out the tiny grains and lifts it, the white gets a little mucky from the base coat so doesn't have the "Daz doorstep" effect.
 |
| Reverse slope and view of the palisade. We need to see some guns on here to get some perspective. |
 |
| The wolf-pits and gun platform. The planks and groundwork came up well with dry brushing. |
.JPG) |
| Most of the green sprayed bits were flocked over but not all. Some areas were covered using a different shade and some areas were flocked twice. This worked well and managed to break up the slopes visually without making them too lumpy. |
 |
| This stage involved dry brushing the flock with two shades of very bright yellow and inking some of the raised stone work to re-emphasis the contrasting textures. These two processes began to "tie-in" the various aspects as a model. |
 |
| Now we are closing in on the final phases - the climax. A few carefully placed grassy tufts are glued on to cover any odd shapes left by the glue or clumsy dry brushing. These are self adhesive BUT I still press them into a blob of PVA. |
 |
| The finished model just prior to varnishing. I need to call Tony to provide some Russian guns for the final shots. |
 |
| Finished front view prior to varnish. |
 |
| Disappointing shots of the gunners in situ. Will get some better ones for you! |
 |
| "Witness the power of this fully operational Death Star!" |
 |
| Raevsky eyes up the approaching French. "Let 'em have it boys! Fire!" |
Post shag fag.
In conclusion. I really enjoyed this project; I can't recall the last time I did anything like this, must be years. Of course I made some town modules and rough ground bases but that was just assembling models and doing some groovy basing.
This project can't have taken more than three hours. Granted those 3 hours were spread over about 4 weeks. The longest job was dry brushing the grass - possibly 30 minutes. How many hours did I spend thinking about it? Far more - and loads of fun it was too! Planning it was a great experience; I'm glad I had my brief in place to keep it simple and on course - invaluable.
Hopefully you enjoyed following this project, I'm in no position to call it a "tutorial" as I am no expert. Maybe one of you will have a crack at a redoubt too and let us all know how it went.
Next plan - fleches!
Nice post, and great result!
ReplyDeleteThank you for sharing,great job and an even greater sense of humor.Love it!
ReplyDeleteCyrille from across the Channel
Truly impressed by what you've achieved.
ReplyDeleteI've posted a link on my blog.
Pjotr
http://nyudrevchronicles.blogspot.be/
Very nice. Always great to see proper terrain finished. This is a masterpiece.
ReplyDeleteBrilliant, Perfect timing as I needed inspiration for a similar 15mm project.
ReplyDeleteThanks for the positive feedback - much appreciated.
ReplyDeleteTony and I are going to prepare a proper position battery based on planks to sit in here without the grassy bases. No idea when but it'll good excellent I'm sure.
Have fun,
JJ
I have just 'discovered' your blog c/- your post on Lee's one. That's a beaut scratch-built redoubt. Looking forward to seeing the flêches once they are completed!
ReplyDeleteI have put together a 'communal' blog called 'Wargaming Waterloo 2015' with links to bicentennial activities of wargamers around the globe (http://waterloo2015.blogspot.com.au/). Currently the focus is on Borodino re-fights, but I am also updating lists of links to games from other 'bicentennial years' (such as your great Katzbach game).
Check it out and feel free to make contributions. I'm happy to make others authors if they'd like to be.
James
Thanks for your kind comments James. I took a look at your stuff - coming along very nicely as well.
ReplyDeleteI noticed you are from the Avon Valley - I couldn't believe there is Avon Valley Napoleonic Fellowship - we are based in the Avon Valley too, the River Avon runs past us jest a few hundred yards away! Naturally this is the English River Avon - however we could be honorary members from the old country!
Have fun out there,
JJ