This gaming session really saw the first serious engagement of the battle while the main bodies closed up for a real ding dong next week. The pictures show a lot of seemingly minor movement as this battle continues to build towards a climax.
The charge of the Old Guard Cavalry
Last week saw a stand off between Friant's French infantry brigade & two regiments of Austrian Uhlans. This week saw that stalemate thrown out of the window with unexpectedly spectacular consequences...
 |
Chasseurs a Cheval of the Guard - probably the finest light cavalry regiment of the era.
Scarcely noticeable is the rear squadron comprising Mamluks. |
The Austrian Uhlan brigade "blinked" first & launched a charge against a French column - ballsy. This sudden aggressive move had unexpected & far reaching consequences. Friant himself was so taken aback by the threat of charging cavalry with long pointy sticks that he fled the scene leaving his brigade to fend for itself, this cowardice caused the brigade to
falter. Standing fire fire was desultory & the uhlans closed with
elan as the foot
unformed - not good! The resultant melee was brief & bloody. The French foot were cut down and the leaderless brigade was thrown back in disorder as the Austrians occupied the ground.
 |
| This is the moment just after melee, the cut down column has been removed, the Austrians take the ground. |
 |
| Here we see Friant's former brigade falling back around the supporting cavalry brigade, you'll have to imagine the chaos as this all looks very clinical & ordered! |
So what?
The obvious outcome of this charge seems to have gone in the Austrian's favour. Friant's brigade, the only large force of French infantry on the north bank of the Edro has been severely compromised & a breathing space delivered along with a loss of one ADC to the French command structure. So far all so good.
However, the bigger picture is somewhat more serious. Stuck behind Friant was the French Guard cavalry, no better support can be imagined and for the Austrians we were very happy for them to remain in support as the French could find no easy way to get them into the front line & exert themselves. The retreat of the French foot opened a hitherto closed door for the Guard cavalry to enter the fray with obvious threats to the Austrian position & specifically to the uhlans!!!
The worst possible best result?
 |
| Here we see the Chasseurs a cheval of the Guard having mauled the lead regiment of uhlans who routed & then dispersed. |
 |
| The follow on charge crashed into the second regiment of uhlans who suffered the same fate. |
This was the most decisive action of the evenings play & may well unlock the Austrian northern flank if the situation can be capitalised on.
 |
The French Guard cavalry brigade consolidates it's position by bringing up a horse battery - Excellent!
Friant's brigade tries to reorder itself; it'll be needed if the French are to exploit this unexpected turn of fortune as even Guard cavalry can't really hold ground only take it. |
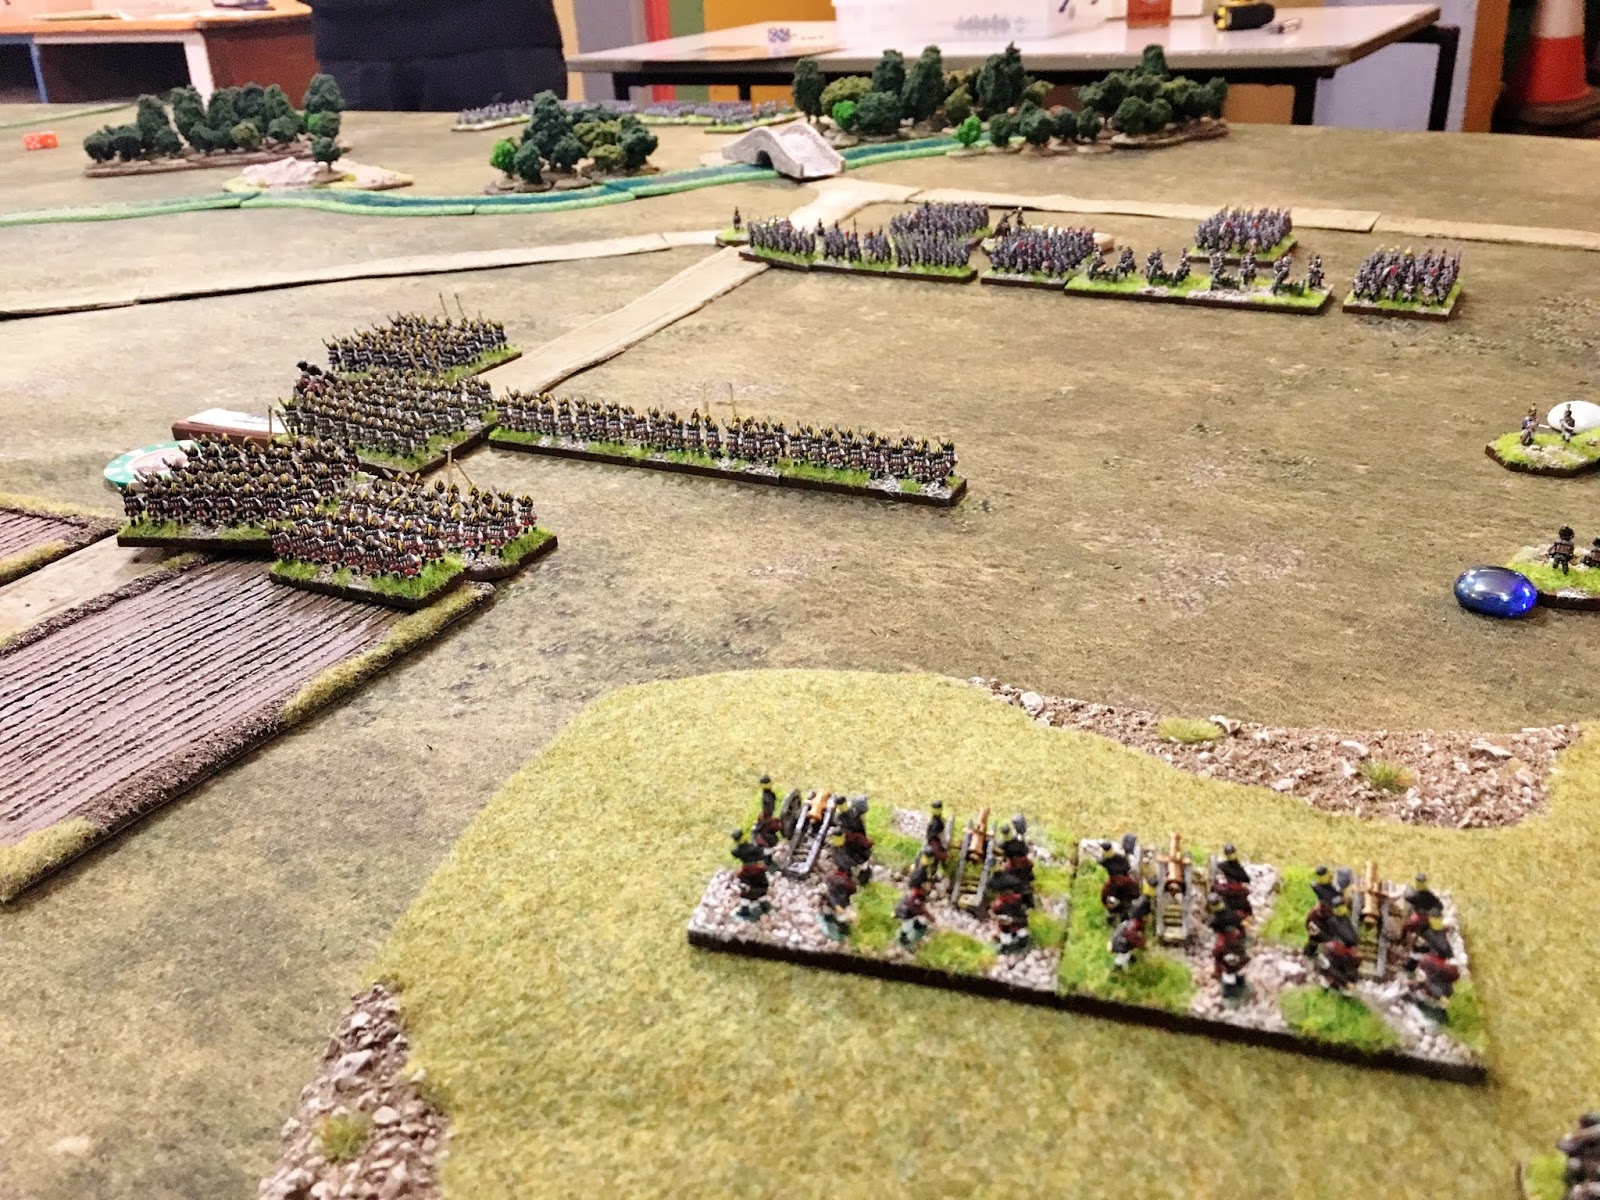
The main event - The centres close.
The action south of the Edro will seem somewhat boring in comparison to the previous eruption of violence to the north. Here my three large infantry brigades crept up at a snails pace. This sector seems to be a slow burner as the French opposite were sluggish too. Nevertheless we began to close & the war of attrition opened.
 |
| My central infantry brigade of three finally crests to ridge proceeded by jaegers. The French batteries are deployed already while mine must move up limbered before opening fire, the French gunners took full advantage of this. |
 |
| The Austrian C-in-C brought up two brigades of Grenadiers from reserve to support my assault, each with a 12lb battery. |
 |
Here we see Nordman finally get his cavalry reserve to trot forward a few feet.
The top of the picture shows the French heavy cavalry reserve, a constant threat my infantry, I need to counter them. |
 |
| On my extreme right flank in the south these Chevau Legere take a wide march across farmland past this farm looking for easy prey. |
 |
The French centre well deployed to counter my ponderous advance.
Note the Grenadiers crossing the small hill to support my thrust top centre. |
 |
| Looking south east over the ridge from behind the French lines. Nordman's heavy cavalry can be seen in motion and another brigade of Austrian Grenadiers on the back line. |
 |
My left advancing with heavy cavalry support and light horse securing the southern flanks.
I hope to squeeze the heavies through that gap if needed! |
 |
| Looking down on the centres, that bridge is my objective. My front line has advanced imperceptibly except the jaegers who are shooting up the French prior to my attack. |
 |
Shifting south from the above scene to the far south. French heavy cavalry still in reserve for now...
My heavies change formation to execute a cunning plan which in retrospect I think may have been rather foolish of me given terrain considerations, we'll see. |
 |
| Austrian General Meyer orders hos brigade to assault the French position as they close in. |
 |
| Austrian artillery cover the advance here as one of the large Austrian columns forms line after taking sustained artillery fire |
 |
The only significance of this shot is that the French heavy cavalry reserve have been released & thunder towards my southern most infantry brigade - uh oh! My supporting heavies may now be in the wrong formation.
Cunning plan - my arse! |
 |
Great shot from above the Edro Gorge looking south as the lines close.
This will kick off next week in every sense! |
 |
| Breaking news - the Old Guard foot march to support the French centre against my assault. |
 |
Meyer's brigade is finally ready & in position to launch a charge.
Question: What could possibly go wrong? |
 |
| Answer: Meyer could be killed & his brigade falter. |
I keep saying that "this is why we wargame, the highs & lows, ebb & flow, the roller coaster ride". Just sometimes I wish things would go right, is that so wrong? Instead the Dice Gods defecate on my head from a great height! No one likes a dirty bicorne.
Grit teeth, be a big boy & get on with it Jeremy. This is why we wargame ;)
 |
To compound matters Tony's heavy cavalry make a fabulously successful forwards order and are now threatening me all over the place and have even deployed two horse batteries!
Predictably my own heavies are too far away and in the wrong formation - my own fault entirely this time. Silly boy. |
 |
| Frau Meyer mourns the untimely demise of her husband - and I thought I had problems! |
Minor developments on the Austrian left
 |
Much to my surprise both sides committed significant forces to the Edro Gorge.
Austrian jaeger get into the Monastery of St Vincent & snipe at the foes cramped up on the bridge. |
 |
| As one French brigade queues up to cross the ancient stone crossing another forms up behind it!!! |
 |
| Austrian chevau legere begin to hook around to the rear of Pajol's diminutive cavalry formation. |
 |
| Austrian line maneuver near the monastery. |
 |
Nice incidental shot of the Great Bonded Warehouse & the Manager's house; he has a small apple orchard in his field,
which is nice. |
 |
| Those Austrian chevau legere moving up on the French right flank to the north. |
 |
| Austrian staff on the cliff top watch the close range firefight on the bridgehead - difficult terrain for formed troops. |
 |
| The Austrians are victorious and throw the Wurtembergers back across the Edro for now at least... |
 |
| Here we see the aftermath of the charge by Austrian light horse which overthrew Pajol's horse battery faltering the attached French hussar regiment. Could begin to unpick the French northern position? We'll have to wait and see. |
That wraps it up for this week's update, we play again tomorrow so I'll try to post Part 3 soon.
Best wishes,
Jeremy


Jeremy, your game looks awesome! Big table, plenty of troops, and an interesting situation, just what I like!
ReplyDeleteOur views precisely!
DeleteNaturally we need many more troops in the form of a second line. We have very limited reserves to draw upon. The first of these, about 26 battalions & some light cavalry are being based this week possibly not in time to fight on the Edro but maybe next time. Next batch after that includes limbers & masses more cavalry!
Glad you're enjoying this, next part up soon...
Looking fantastic chaps. I thing you have achieved the look you were after.
ReplyDeleteGreat to see most of you at the weekend.
Great to see you too Scrivs, especially looking so well.
DeleteYes this is beginning to look like what I was after, these things take time & resources - both finite...
Very best wishes to you both,
Jeremy
Great stuff ute again! Looks fantastic. May I ask what base sizes you use? /Mattias
ReplyDeleteHi NW Crew,
Delete"Fantastic" suits me - many thanks for the compliment.
The bases are 7.5mm x 10mm per foot figure, these are then based in two ranks either 6 or 8 models across depending on the size of each company. The cavalry are 10mm X 30mm per model based in two ranks with eithre 12 or 16 models per base depending on Squadron size, two such bases per regiment.
I hope that helps, any questions just ask.
Best wishes,
Jeremy
Don't forget these are 10mm models not 6mm!
DeleteStunning images. The troops en masse really convey the feel of the battle. And the painting truly impressive, especially consider the scale.
ReplyDeleteMany thanks Dean, such positive feedback is really encouraging.
ReplyDeleteThe look of the thing is exactly what we were after, the realistic aesthetic of movement of formation in "time & space" is the key for us.
The painting we can't take much credit for as my fine friend Barry Hill takes care of that for us bar a few units by Tony - notably the Wurtembergers.
Thanks again, best wishes,
Jeremy
Great stuff Jeremy (and co.).
ReplyDeleteI know what you mean. Generally one can laugh in the face of adversity, but sometimes those crucial poor die rolls hit hard; but we must get back on the horse...!
The problem with "getting back on your horse" is that one tends to attract one too many stray howitzer shells usually with your name written on them!
ReplyDeleteThese rather trying situations become the stuff of gaming legend over time so yes one can laugh in hindsight.
Best wishes,
Jeremy