Currently ensconced at The Grampus, a north Devon pub! It's 11am, I'm giving the very drinkable Kraken a miss until later, for now I have a strong fresh black coffee and free wi-fi so I can write this up in peace & quiet.
The last visit to Bautzen saw mixed fortunes for the Emperor as his attacks faltered or were plain old repulsed! Wittgenstein's allies still sit pretty in strong positions with solid reserves to the rear. However Ney has arrived to deploy his strong forces against the allied flank, can he get a breakthrough & let the heavy cavalry loose? Let's see...
 |
| These Russians have retaken their redoubt & now look very strong. even the Cossacks look confident. I have a sinking feeling these are moving forward past the redoubt though... |
 |
| Here part of Ney's attack goes in with accompanying light cavalry brigade. |
 |
Finally the Allies feel compelled to actually move some reserves.
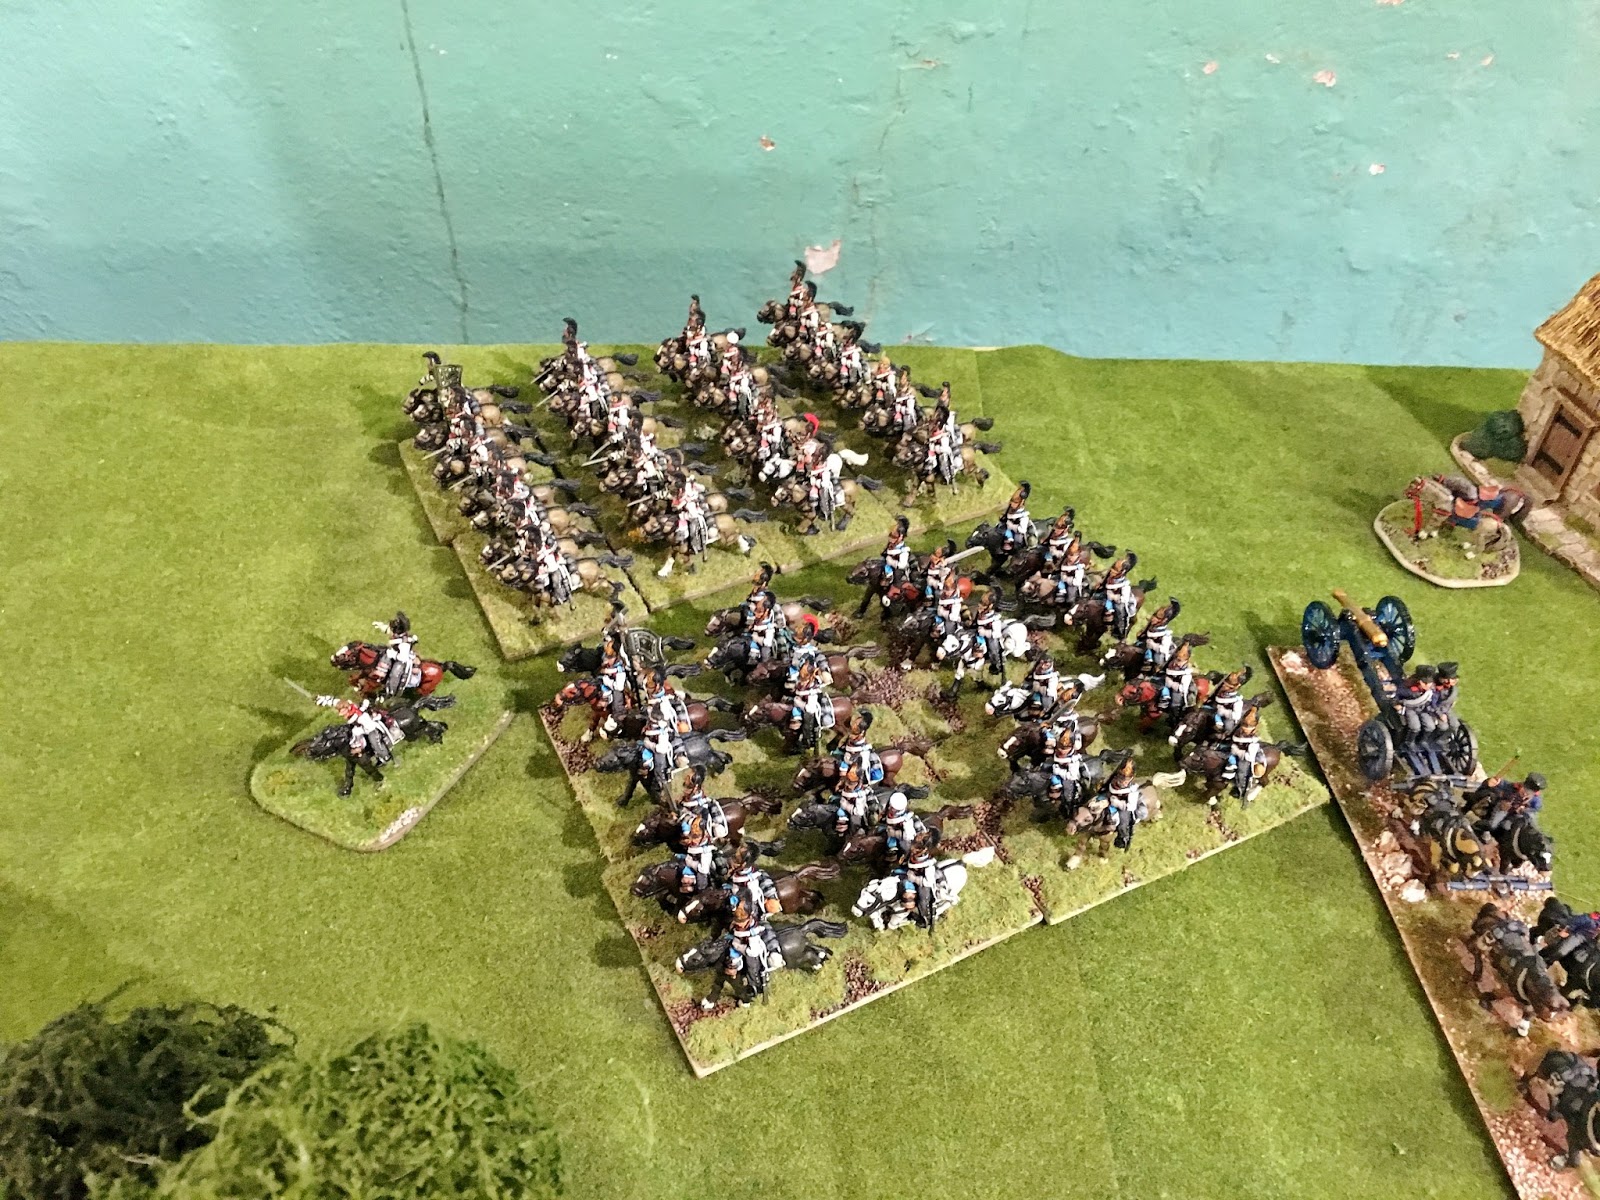
Here the Starodub & Novgorod cuirassiers move off. |
 |
| Ney's infantry move up amongst the ponds. |
 |
| French 5th Hussars close with a Prussian line from Yorck's Ciorps. They cut down one battalion but can't make it count so will have to retire, breath their horses & go in again. Note Prussian Guards battalions forming a second line just in case this had gone in favour of the French. |
 |
Here Blucher's boys up on the hill take the damage as Napoleons German allies from Bavaria & Wurtemburg charge.
This hilltop sees savage fighting all day. |
 |
Chris simply can't conceal his glee any more. It must be great when a plan comes together...
In the foreground Old Guard cavalry move forward to stem what now looks like a full blown Russian assault.
Old Guard foot await orders to advance - our last reserve. |
 |
| My attempted charge by Saxon light horse went rather poorly. They fled backwards through most of the Middle & Young Guard unforming them. Note Poles as YG proxies. |
 |
| Elsewhere a brave Italian battalion captured this redoubt from the Prussians cutting down the battery. Supporting Prussians cause them to regret their impudence with a withering series of volleys. |
 |
| Other Italians close against the 12th Reserve Battalion, a glimmer of hope? |
 |
Blucher is shoved off his hill as a Wurtemberg column does the business. Saxon heavies lurk...
Pressure is building on the linch pin of the Allied position. |
 |
| Russians forming up to attack, haven't they read the scenario pack? The French should be attacking here. |
 |
| Apparently not! This looks scary! |
 |
| Middle & Young Guard reform and advance to support & exploit the expected breakthrough. |
 |
| One of the toughest things to pull off in wargames is demonstrated above. The deployment of large bodies of troops in time & space. Latour Maubourg's Cuirassiers are in exactly the right place for when the infantry's break through happens, they even have horse artillery in tow. The problem is how to get through all the infantry quickly and in numbers. Beyond me! |
 |
| Old Guard Grenadiers a Cheval, Austrians proxying, charge Russian a square which is obliterated. The successful charge runs on into another Russian battalion. This is on the French right where Oudinot has been repulsed and Russian Corps are now threatening to overwhelm the centre just as Ney is looking a bit more confident on the left. |
 |
| The Russian centre advancing with malicious intent, these Frenchmen seem powerless to stop them. |
 |
| More Old Guard cavalry move up & the Old Guard foot must move to prop up the centre, desperate stuff. |
 |
| Still looking for a way through, such power made impotent by the lack of opportunity, like a teenage boy's libido! |
 |
| Blucher's ex-hill and the centre - now mostly filled with furious Russians! |
 |
| Similar shot showing the pressure thrown against the allied position by Ney's various Corps. |
 |
| The Russian Grenadier Division with attached battery & half a Hussar regiment move up in support of the Prussian redoubt which is now safely back in Prussian hands. |
 |
Great shot along the centre, the Allies look very strong despite Blucher's local difficulties.
In the fore ground cavalry from the Russian Life Guard Corps arrive to counter the French OG cavalry. |
 |
More Russian Life Guards, this time the infantry moves up to support Blucher who is taking a brutal battering.
In the background is the Allied extreme right where Ney is still banging on the door. |
 |
Prussian 8th Reserve IR - Wargames Foundry models painted by Barry Hill, GMB flag.
Behind are Calpe Miniatures Prussian Dragoons painted by Tony Laughton. |
 |
| Ney deploys his veteran horse battery to fire cannister at the Prussian line to soften it up, sound enough - no one told the Prussian 2nd class line who soak it up & fire back faltering the battery. Bah! |
 |
| Looking along the Allied rear table from Ney's position. Yorck holds the front line, Prussian Guards behind them, then we see the Russian Cuirassiers and Russian Guards moving up. Ney has a lot of work to do. |
 |
| Blucher rallies a faltering Prussian brigade, possibly Kliest, which has been messed up by the Italian attack. |
 |
Pavlovski Grenadiers, one of the most recognisable regiments of the whole period.
Wargames Foundry models painted by Russian Tony. |
 |
Very pretty Russian Hussars, I always forget which regiment, Elizabetgrad?
Wargames Foundry painted by Russian Tony again. |
 |
Over on the French right the Grenadiers a Cheval charge another square but fails to break it retiring on blown horses.
Russian Guard Cuirassier, Guard Hussars & Guard Uhlans approach. |
 |
| Prussian LDW cavalry charge a faltering Italian battalion. This move is to try to buy time for the broken brigade to reform and hold the line to the rear. |
 |
| The rampaging Wurtemburgers charge a faltering Prussian line. |
 |
| Ney struggles to feed troops between the ponds in sufficient to break through. Yorck holds. |
 |
Good Lord! These Saxon cuirassiers may actually get a charge off!
Note Blucher is back up the hill hanging in there by his finger nails. |
 |
| Russian Guard cavalry with attached horse battery advance - a splendid formation! |
 |
A general view of the action over the three tables.
This is why we do this, it's like theatre. |
 |
| Blucher finally loses control of his precious hill top position. |
 |
| Can these Middle & Young Guard battalions effect a game changing breakthrough? |
 |
| The French centre right ceases to exist - which is frankly embarrassing. |
 |
| French forces arrayed against the Allied right & on the hill. |
 |
| Russian & French Guard cavalry face off, the Silly French Guard lancers end up charging Russian squares in the woods leaving the Chasseurs a Cheval of the Guard to deal with Russian Guard Cuirassiers - which they don't do very well! Oops. |
 |
Russians attack the Young & Middle Guard drawing them away from their task of exploiting the break through.
Prussian dragoons charge the Wurtembergers on the hill. |
 |
| Angry Prussians recapture their redoubt while others rally behind the supporting Russian grenadiers. |
 |
Russian Guard infantry & Cuirassiers await the outcome of the battles in the centre & allied right.
Will they be needed? |
 |
| Ney sends in the 9th Hussars leading from the front as time runs out. |
 |
| Russians now occupy the whole centre & keep attacking. |
 |
| The Allied centre & left looking very muscular! |
 |
| This the hole I'm supposed to exploiting with the Young & Middle Guard. |
 |
The Prussian dragoons cut down the exhausted Wurtembugers then retired on blown horses.
Saxon heavies approach the front line finally, they line up a charge... Blucher joins the target battalion... |
 |
The French 9th Hussars win cutting down one battalion and severely damaging another causing it to break.
We have our breakthrough! |
That's it for this instalment so I must leave you on a knife edge. Can Ney make this count? Can the Saxon heavies unravel the Allied centre in an avalanche of glory? It's a cliff hanger. You'll have to wait and see.
Best wishes, Jeremy


Superb account, thanks for putting all of that together.
ReplyDeleteCheers Norm, it takes ages but it's worth it.
DeleteAbsolutely outstanding Sir!
ReplyDeleteCheers Sparker - your comment appeared twice so I deleted one of them. Thanks for persevering. JJ
DeleteThis comment has been removed by a blog administrator.
ReplyDeleteFantastic! Though "Old Guard Grenadiers a Cheval" had me staring in pic at confusion for some moments until I looked back and read rest of caption!! Same with the "Young Guard"... :) But still awesome!
ReplyDeleteYou're right we need some French Old Guard cavalry & artillery too really, it's on the list, the list is just very long...
DeleteJeremy you never, ever cease to impress with these posts mate. Always so many beautiful units and so much fun in the narrative.
ReplyDelete"such power made impotent by the lack of opportunity, like a teenage boy's libido!"
GOLD!!
Why thank you Carlo, we all very much appreciate the comments we get.
DeleteYep that was a good line, I still feel that "power" on occasion!
Splendid! I'm thoroughly enjoying reading this one, as I do all your reports. You've inspired me to get to work on painting my Prussians again.
ReplyDeleteGood man Robert, where can we see your Prussian's?
DeleteExcellent battle report Jeremy!!! Lots of eye candy, great to see the close ups of some of your units to!!! Fabulous collection, complete inspiration across the table!!!
ReplyDeleteHi Paul, we all love some eye candy and we have a few new bits to base up before photographing & posting. Always happy to inspire, Jeremy
DeleteExcellent reading and viewing.
ReplyDeleteSalute
von Peter himself
Cheers von Peter.
DeleteFabulous and entertaining reading/viewing Jeremy.
ReplyDeleteWill the allies rue their bold attack? Can Ney effect the left-hook, hampered as he is by a lack of gee-gee troops?
We await part three at Your Majesty's pleasure!
What rules are you using?
ReplyDeleteHi Flayed Man,
ReplyDeletewe use the excellent General de Brigade rules by Dave Brown. They are very detailed and possibly a "stretched" at this level but give a great Napoleonic gaming experience. Hope that answers your querie adequately?
Best wishes,
Jeremy