This finale on the Edro conflates three gaming sessions into one post. The action happened in fits & starts in various sectors so the trick is to get the narrative to work while much of the battlefield was either dithering or redeploying or simply healing their wounds!
Heavy cavalry charges in the south.
My ingenious plan to outfox the French heavy cavalry was ill conceived & ended up in a head to head battle of big men on big horses armed with nasty sabres. Despite me gaining the initiative in the charge phase the French pulled a draw in the melee, both sides had healthy supports who plunged into the fray as reinforcements in a second round of melee. This I lost & was thrown back whilst the Frenchmen returned to their own lines for medals.
 |
| The lead regiments close, the French are unformed in the charge phase an advantage my boys failed to capitalise on in the melee phase. We drew... |
 |
Both sides threw in supporting regiments & we went again. The Frenchmen triumphed.
I think I played a Glory card here & still lost quite badly... |
 |
| Here we see the Austrian heavies having retired with fairly heavy casualties & their French counterparts back on their start line being smug. |
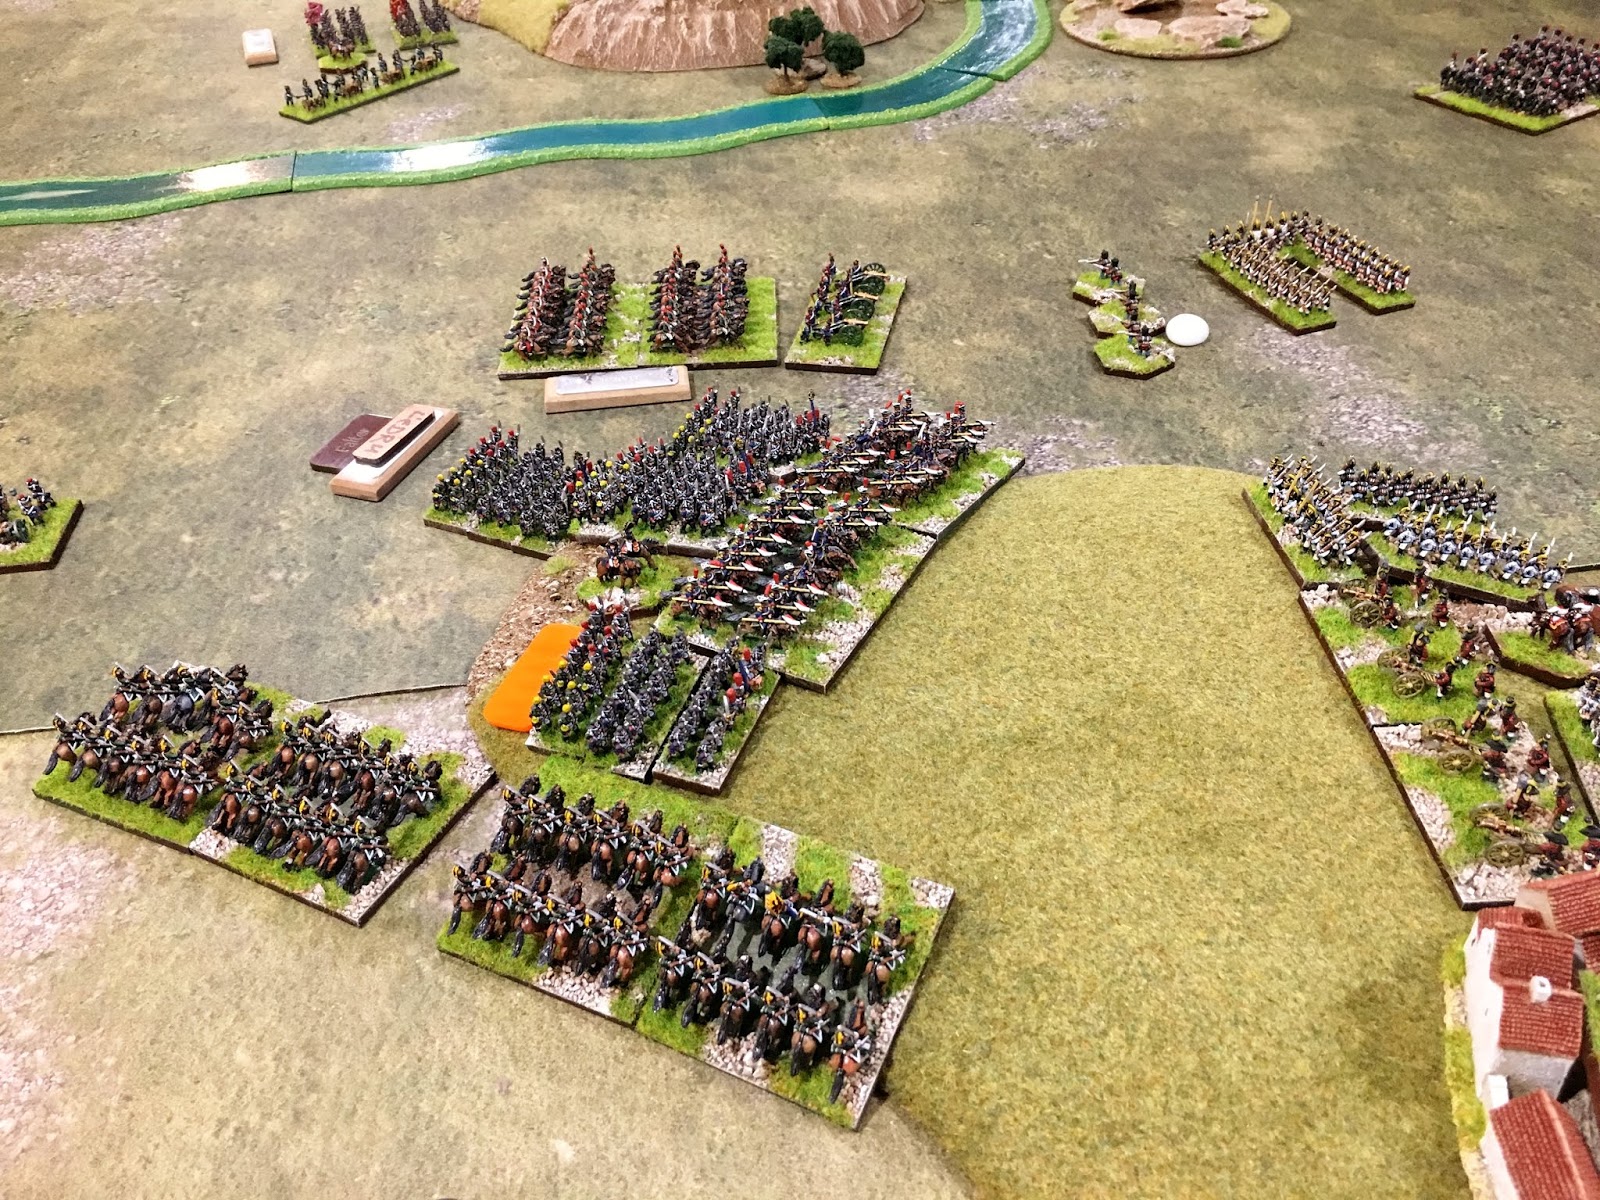
The picture above shows Austrian infantry brigades on either side of the heavy cavalry still spectacularly failing to close with the French. Top right are two small Austrian light cavalry brigades trying to sneak around the southern flank of the French army - ironically the table is still too small!!!
An overview of the rest...
 |
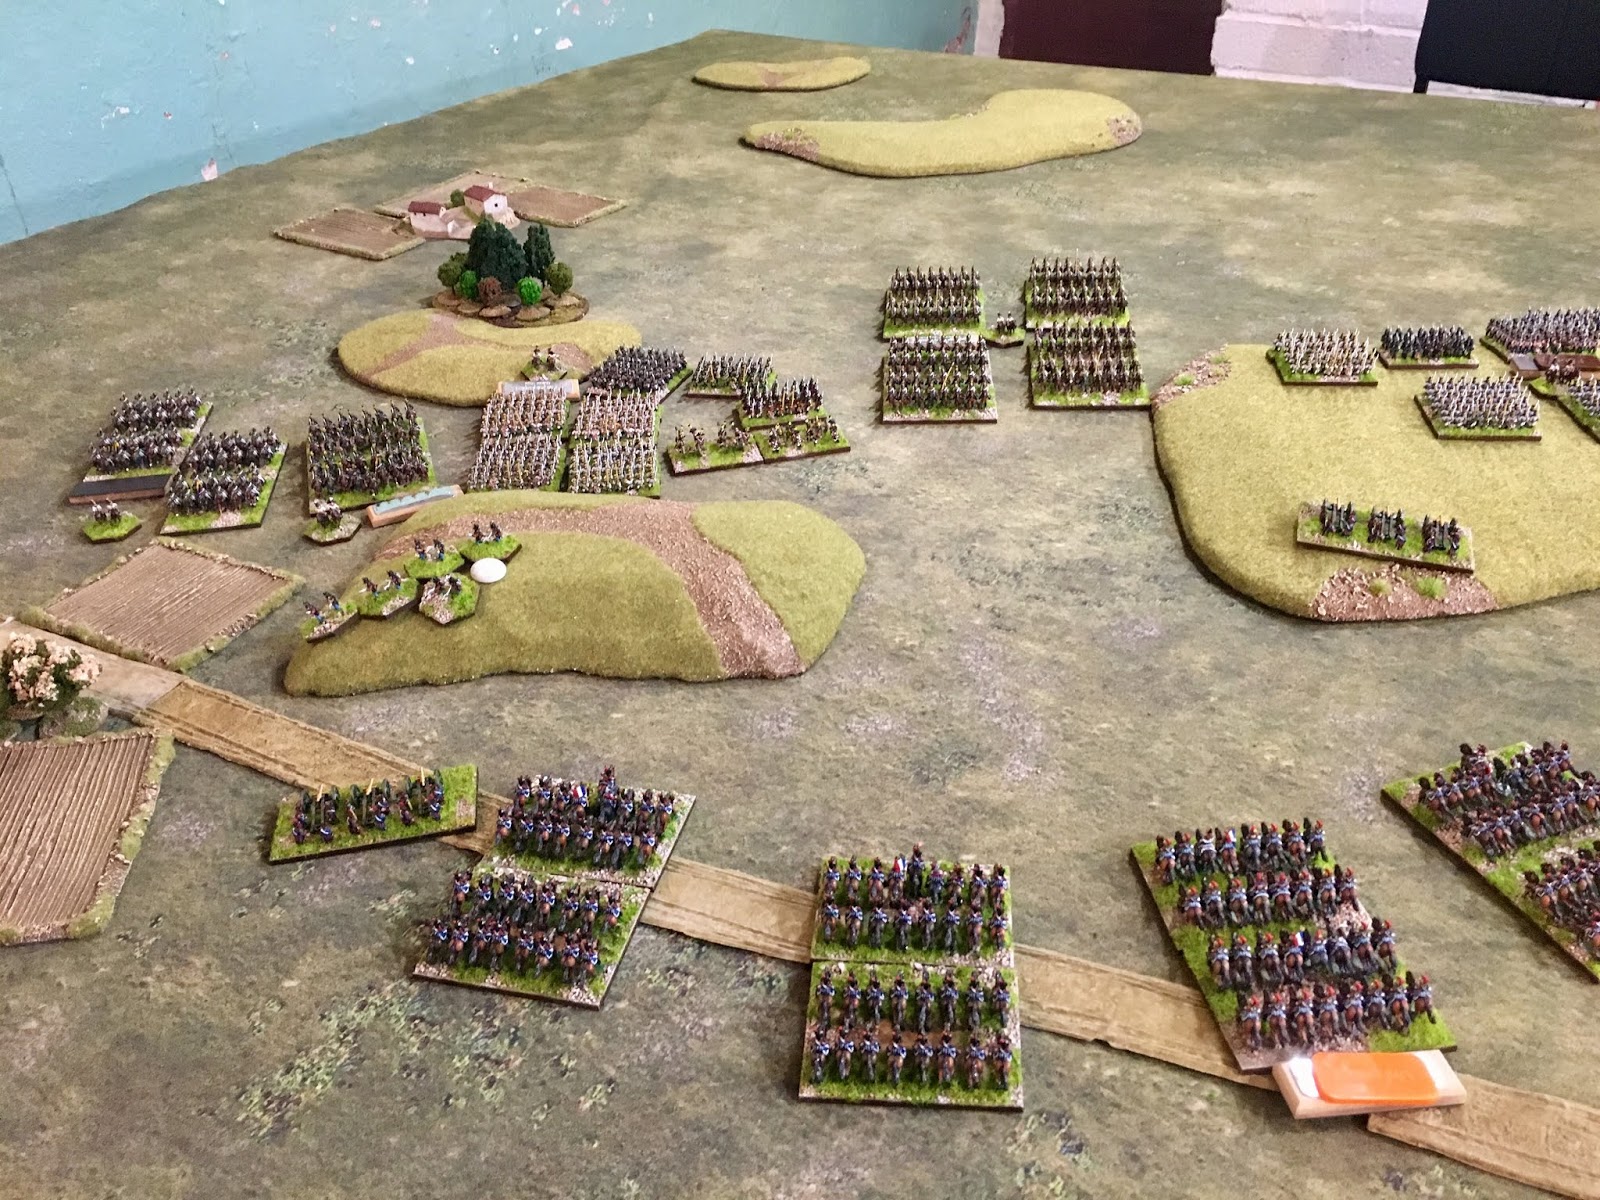
| My main attack was supposed to be by these two big brigades of Austrian foot. Both were typically muddled or dogged by lack of momentum - very Austrian & a good reflection of the GdA rules! This proved immensely frustrating as the French were out numbered & despite some attempts at battering by artillery & quite effective skirmish fire my advance just kept stalling - all the while the French position strengthened. |
The picture above shows the arrival in theatre of the Old Guard Foot regiments & two 12lb batteries who finally crossed the bridge &
marched to the sound of the guns.
 |
The initial Austrian attacks here had disintegrated & got mopped up with the help of the lead Old Guard battalion.
Here we also see, bottom left, one of our reserve grenadier brigades finally deploy their guns & prepare to cover the retreat of my shattered line brigade. |
 |
Over in the Edro Gorge the enemy have finally been broken by concentrated fire, they retreat from the bridge leaving their skirmishers to cover their tracks. Behind the Gorge Dupont begins his long march south to the centre.
We now hold two of the three vital bridges. |
 |
| On the northern flank Austrian chevau legere move up having taken out Pajol's tiny cavalry brigade. Friant's brigade has been taken over by Ledru after the former legged it. Ledru's infantry & the Guard Cavalry batter away at the isolated Austrian infantry brigade on & around the hilltop. |
 |
| Dupont leads his entirely fresh brigade south while Och's retreating troops abandon attempts to seize the stone bridge in the Edro Gorge. |
 |
| Here we see the Old Guard infantry attacking & routing the already scattered Austrians. |
The attack by the Guard infantry is initially successful as they went straight into battle from march formation having crossed the bridge. However, as we shall see, there were to be consequences to not reforming into a brigade battle formation as the battalions were fed in one by one as shown above.
 |
| Looking across the centre from behind French lines. These two French brigades, Delzon & Broussier I think, take advantage of the shambles in the Austrian command to launch an attack. Possibly tony just got bored of waiting for me to actually do something so just did it himself. |
 |
| The French southern flank - here the French heavy cavalry with two horse batteries are holding up four Austrian brigades including von Hammer's infantry who are fresh and haven't yet fired a shot yet, except the battery which is already low on ammunition so somewhat emasculated. |
In all the subdued chaos of my ponderous forward movement I had already lost General Meyer to hostile French artillery fire. The faltering brigade was soon taken over by a Colonel. My mind went blank whilst trying to come up with a name for Meyer's successor & for some reason arrived in the WW2 sitcom Allo allo! Why this happened I cannot explain, all I can say is that the brigade leader was Colonel Kinka. Sadly his tenure in command was as short lived as Meyer for a well aimed cannon ball soon found him & killed him. This broke the brigade which retreated leaderless back over the long low ridge.
Chris will be furious.
 |
| Frau Klinka stars in an all too familiar caption for Austrian generals in my command. |
Chris returns and is not furious - he is infact rather sanguine about the situation.
With Klinka's body still bleeding out on the grassy hill top a new leader for Meyer/Klinka's brigade had to be found. Once again my brain went down an unexpected cul de sac; up stepped Flugel. This time the name came from the sci-fi 1947 WW2 game DUST, no idea why. Anyway Colonel Flugel inherited the dubious honour of getting an assault underway before any remaining shred of my martial decency was stripped away. Let's see how he would do.
 |
Flugel's brigade rallies under his obvious natural authority & they once again march up the hill "Grand Old Duke of York" style. Nordman's heavy cavalry also regain some composure & trot forwards too.
So far so good. |
 |
| The situation looking north from the left of Flugel's position. |
 |
| Here we see the intervention of the Old Guard infantry. They have so far taken out two Austrian line battalions only to have their own lead battalion cut down to a man by 12lb canister fire & effective volley fire from two veteran Austrian Grenadier battalions. Both lines are thinning out here now. |
 |
| The side show on the northern bank of the Edro. Repeated French cavalry & infantry charges are met with canister fire & now the Austrian light horse are closing in on their exposed flank. |
 |
| Austrian foot artillery in the Edro Gorge - now safely in Austrian hands. |
 |
Looking south from above the Edro Gorge. The lines are indeed thinning out.
Apologies for the rule book in shot - my bad. |
 |
Ledru's foot are charged in the flank, first one battalion then another are run down faltering Ledru's brigade.
French Old Guard cavalry fail to make their presence properly felt. |
 |
| Back at the ridge the French attack nears my lines. |
The attack of the Old Guard foot & the last engagements as the sun sets.
With fighting beginning to quieten down along the line we all watched as the Old Guard attacked. It's a horrible responsibility for any player to do this; if you win it's rather expected - if you lose you're a total tosser! Note also that these are new toys who have never fought before... I know!
 |
| The remaining battalion of Old Guard Grenadiers supported by two Old Guard Chasseur a pied battalions marches to war. |
 |
| The Old Guard face off against von Bulow's Austrian grenadiers with a 12lb battery in close support. The Guard's own batteries are deployed to the rear & now masked by their own battalions. Elements of Broussier's brigade has a flirty firefight with the remnants of von Ruess's formation, both are bled dry. |
 |
| Flugel crests the hill to face the French assault. |
 |
| The other Austrian grenadier brigade feeling pleased they are nowhere near the Old Guard attack. |
 |
Having ridden down two of Ledru's battalions the Austrian light cavalry brigade run into Polish Guard lancers...
The Guard lancers cause massively more casualties but are destroyed in the process - weird result - dice eh! |
 |
| The lead Austrian battalions get a wobble on in the face of French attacks & go unformed. |
 |
| This is an important development... Austrian battalions descend from the heights around the Gorge heading south towards the central action. |
 |
| Three Old Guard battalions looking splendid. |
 |
| Initial attacks by the Old Guard force back the Austrian grenadiers. |
 |
| Both sides form line - will this be resolved by a firefight not a charge? |
 |
"There may be trouble ahead..."
Austrian battalions threaten the OG flank & the Austrian 12lb battery hastily redeploys. |
 |
| In the initial exchange the Old Guard take a pounding from that 12lb battery firing canister. |
 |
| When charged in the flank the OG rout although the Austrians are reluctant to follow up their advantage. |
 |
| So, an inauspicious debut for the Old Guard infantry. Maybe it was doomed from the start, who knows? Their supporting artillery were miles behind & unable to fire in support, they were led in one by one then got flanked & faltered. |
 |
| The bridge over the Edro in the Gorge is safely in Chris's hands. |
Sunset moves.
 |
| In the north a final charge on Austrian squares by the Grenadiers a Cheval is held at bay; Ledru's command is scattered by rampant Austrian light cavalry. |
 |
| Flugel repulses the French assault & contemplates moving off the ridge to capture that last bridge. |
 |
This is my southerly/right flank. It has achieved nothing despite being largely in good health.
At this point with the sun setting and the bridge miles away the only result I can get by advancing into charge range of the French Cuirassier brigade is bad; if I win it's irrelevant, if I lose it's an utter mess. Playing an Austrian I sit & watch. |
 |
Tony is NOT one to sit & watch.
With blades & breastplates glinting in the setting sun he launches his regiment at mine. |
 |
Despite my supports Tony closes with elan as mine unform.
The following melee punishes my timidity as his bravery is rewarded - he routs me throwing back the entire brigade.
Bravo monsieur. |
(Note the high watermark for Meyer/Klinka/Flugel's brigade which finally gets off the ridge after 24 turns of play - approx 12 hours fighting.)
As darkness falls both armies are exhausted. The Austrians control two of the three bridges so pull off a win. The French withdraw under cover of darkness to lick their wounds.
 |
| The final positions south of the Edro Gorge. |
 |
Final positions in the Gorge & on the northern bank.
|
Well that didn't go so well for me did it?
As a game it had everything. The terrain was challenging, especially in the gorge and the river system on the French side which forced irreversible deployment decisions on Tony.
There was drama & tragedy alongside some very mundane events; for example both sides had whole brigades which weren't engaged at all; Dupont, Hammer, Stipcics & Jurgass! (three of these were mine!).
This battle threw up quite a few rules questions, it's unusual to see we three scrabbling through the rule-book, I can happily report that the GdA book answered all of them one way or another & delivered us another truly memorable & rewarding game which is all one can ask really.
The table top & the collection is very pleasing to look at, something which we will work on constantly to fine tune.
The Austrian army is still larger than the French and both sides really needed another two or three brigades of infantry each to form a second line of reserves - this has since been rectified. Our next game will debut about another 25 units split between the two sides evenly. Hopefully soon after that another French ally brigade & then a large dollop of French cavalry which should bring some parity to the armies. I nearly forgot to mention the limbers & Old Guard artillery too, they're with the painters now. Then we need to sit down & get serious about what's next for the collection.
Many thanks to Tony & Chris for a great game & for putting up with my sober befuddlement!
Thanks for reading if you got this far! If you did please comment. Very best wishes,
Jeremy


