Welcome to Marauder Moments - a chronicle of the Mortimer Street Marauders; the games we play, the rules we use, the figures we play with and the scenery they fight over. Hope you enjoy these pages and maybe call back to catch up with our escapades.

Saturday 21 January 2012

The Fords of Missen - 1813. A simple campaign idea.

The first week in January saw us all creep into Marauder HQ with little or no direction other than feeling cold and overindulged after the massive Christmas & New Year feasting & binge drinking. Incredibly we decided to tidy up and reorganize our scenery collection, have a good sort out and throw out some broken old crap - very therapeutic. We did this in pretty short order so decided to set up a massive table - 18 x 8 with a narrower middle bit 6 feet across. Then Chris had a brain wave.

Our theatre of operations.

Black board with annotations and crazed scribbling.

We should set up a 15mm Napoleonic game with Divisions approaching from all directions, play it out in 15mm to the point of contact using Black Powder, sit back and sort out which bits were worth fighting in detail and scale up each engagement to 28mm using General de Brigade. Basically the 15mm game became our theater of operations - a campaign board if you like. The hope was to create unusual battles of a manageable size to resolve in one evening - genius.

Having achieved this we still had time to deploy about 80 battalions with supporting cavalry and artillery at various entry points around the board. Basically opposing French and Russian Divisions are converging on the area around the town of Missen. The surrounding countryside is a river valley with various fords and bridges creating an important communications network for the two armies as they seek control of Germany in 1813. We decided on the order in which to fight the battles and how they might link up.

Missen on the right held by Russians with French attacking down the road, in turn flanked by a Russian Brigade of Dragoons. To the left is Obermissen; here the French hold the village and the heights above it. Russians are massing astride the road and threatening to outflank the position with Uhlans.   
The position at Obermissen looks strong for the French - BUT the decision on the ground is very awkward. The best thing to do is hold Obermissen and pull the rear Brigade on the hill out and march to assault Missen which is really where the action is, but will they. This is just the kind of contextual decision making we wanted. The side show at Obermissen will be our first game.  

Missen again pictured centre left. The situation is perilous here for the French and Russians. In the dead centre of the piccy is a French Light Cavalry brigade, 2 regiments plus horse guns, which has found its way around behind Missen. In turn there is a Division of Russian Grenadiers stamping down off the heights and over the bridge to reinforce the Russian garrison at Missen.     
The road to the left will see the arrival of any French troops which can be extricated from Obermissen. This  almost feels like a serious battle situation. When scaled up this will be a mental game with troops arriving from 5 sides of a 4 sided table!!!

So, left of centre is Herr Rheinscmidts Mill & Works, a walled brick works on the banks of the River Misser. Next across is the stone bridge to Zumstadt which is just on the other side at the junction. 
Approaching the Mill & Works and lining the riverbank are French columes. Opposite are Russian heavy cavalry with lots of infantry massing on the heights above, (Including a brigade which marched off the table, hence the empty part of the ridge - Black Powder does that to you!) To the far right is a Russian Brigade which has dispatched two battalions to guard the ford and is waiting to see what happens. Top right is another Russian Brigade streching from Zumstadt to the slopes of the hill, on top of that is a Russian Light cavalry Brigade. Those dark huddled masses coming off the road on the far horizon are more French, a full Division with artillery and light cavalry plus a Cavalry Division numbering four cavalry regiments. 
   
The same scene as above but from the other side - Zumstadt centre stage.
Some of our 15mm collection, French deploy off the road with Russians on the heights behind.
Falcon infantry, chasseurs & lancers, Minifigs artillery and Essex Cuirassiers and command. 

Russian garrison at Missen under attack. Russian Dragoons arrive to counterattack in the background. Various other formations are marching to join this engagement which we will play on 28mm on a full size table.
Obermissen from the south east - can, or will, the French commander order one brigade to hold and march another to attack Missen just up the road.
This is a bloody big table!

Russian jaeger hold the bridge at Zumstadt. A French brigade deploys opposite Russian heavies while more trade shots across the River Misser near Herr Rhienschmidt's Mill and Works. The attack on Missen can just be seen top right. 

The situation in the southern sector laid out before you. Troops piling in from all directions. Our first game will be to decide the engagement at Obermissen in the distance.
So, that sets the scene for our next few club games. We had a real laugh setting this up, since then it has all been taken down and the first game arranged. We took copious amounts of piccies, drew maps, recorded positions of troops and will try to replicate the "feel" of each engagement as best we can on 28mm over the coming weeks.

Black Powder was perfect for running this preliminary game which sets the scene for us and gives each game a purpose. BP combines massively variable moves with an easy going command structure and movement in a happy go lucky framework. For the main events we'll use General de Brigade as usual.

That's it! Thanks for reading this. Hopefully see you soon to watch the actions around the Fords of Missen unfold before your very eyes. We may even video some of it...    

Saturday 14 January 2012

The Battle of Strelitz, 1813. Part 2.

A recap.

So, when we left the battle there had been a monumental clash of cavalry on the northern plain. This had been an outright victory for the French and their allied German heavy cavalry. The Russian regiments and supporting artillery were literally driven ever further back until they broke and fled the field. Although the way was now open to encircle the Russian center this would take time. Although French casualties had been light the regiments were in some disorder with some down right "blown" - this would take time to rectify. In addition to this all the Brigades in the Division had orders only to capture the length of the road NOT to go galavanting onto thew plain no matter how tempting a prize this looked. The General de Brigade rules are quite tough on this so Chris would have to get some orders changed at Brigade level which isn't easy. The up shot was that Chris would need time to redeploy his cavalry brigades and horse batteries having changed orders - all of which he would to do under enemy fire - that'll test his skills!

Strelitz falls.

While Chris had been dashing about doing his happy hussar stuff the rest of the battle had been simmering as well. The central plain was pretty much a stand off with both sides sorting out artillery deployment, screening movement with cossacks and skirmishers. In honesty I don't think either felt strong enough or trusted his troops enough to make an attack; I had an Italian Brigade, Chris had linked up with me by committing half a brigade and Tony's 10 battalions opposite us were 50% militia! Not an impressive array on either side. Further south both sides were making for Strelitz which formed the furthest objective south on the road network we were contesting. This was a vital place to hold.    

Russian jaeger probe the streets of Strelitz ahead of the main columns.
Foundry miniatures by Tony. 

With the mean streets of Strelitz cleared the rest of the brigade makes an entry and secures its flanks.  

Close up of Russians marching into Strelitz. I love this sequence of shots.

Strelitz is secure and the Brigadier can ride in to officially take possession from the regimental officer.
Command vignette by Tony with Foundry figures. 
  With Strelitz in Russian hands they now had to hold it. Coming over the hill with assault orders were two brigades - both foreign allies to the French. The lead brigade was of Bavarians and Wurtenburgers with a foot battery preceded by loads of skirmishers. In Support was a brigade of Swiss, 4 battalions, once again with clouds of skirmishers.

The Russians send troops forward past the northern outskirts of Strelitz to secure its flank and occupy more road space.

The same battalion with jaegers and cavalry to the left and a horse battery to the front. Tony was setting up a tough position here whilst maintaining an all arms attack; Stand back - tactical genius at work! 
This Russian success couldn't be allowed to stop my attack so the Bavarians went in, the guns covering them and 1 battalion left behind to support the battery. This proved to be a game saving decision for me.
The initial charges went in very well, one Russian battalion was forced back past the town allowing a frontal assault by two battalions which also did well but not enough to actually get into the town itself - aaargh!
At this point Tony unleashed the massive 32 strong elite Novgorod Cuirassiers. As the pant wetting reality began to dawn on me they came on up the hill rode through point blank range fire NOT canister as friendly troops were too close, they sat poised to charge down my battery and undo my attack and ultimately the southern flank...

Robbed of artillery support (momentarily distracted by Novgorod nasties) the Bavarians began to falter - fresh Russian troops moved in and although the Wurtemburgers evetually recaptured Strelitz it was only a fleeting visit. Russians in size 14's came stamping back and ejected them at bayonet point - ouch & yuck.

Out of the smoke came the Novgorod Cuirassiers, Duka at the front waving his sword wildly - you had to admire it. The foot battery was wiped out and dispersed on the spot, the cavalry naturally overrode them and headed for the next target which happened to be right in front of them - my Bavarian supporting battalion deployed in SQUARE - there is a God and he likes Bavarian napoleonics! The ensuing episode resulted in the Russian regiment milling about amidst enemy infantry, unable to reform let alone maneuver and taking fire all the time - what a glorious mess - I was off the hook - an ADC was sent for dry pants.

South of Centre

South of the central platuea and north of Strelitz lay another village straddling the road network - history does not record its name I'm afraid. I had moved into this early on with two battalions of Old Guard, Grenadiers and Chasseurs a pied, supporting these two giants of the age were two battalions of young guard and elite skirmishers. Frankly I didn't want them to fight in case I buggered it up and lost them both - too risky. So with all the commotion evolving north and south they didn't do much except adjust their position a bit and soak up some desultory long range artillery fire from a distant Russian battery.

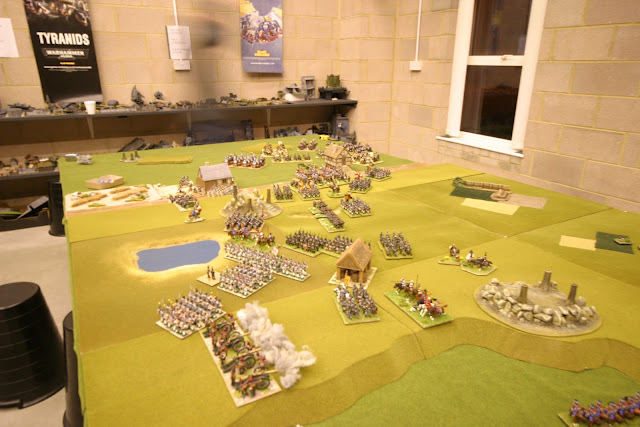
Looking north east over the plateau. My Italians in the fore ground - awesome snap of the Italian 12lb foot battery in action! Opposite the Italians in white are about 5 battalions of militia and cossacks. In the middle distance a full strength Russian brigade of 6 battalions with a six gun 12lb foot battery is covering the road at the foot of the northern escarpment. In the far distance Chris's cavalry brigades are redeploying to attack the eastern end of the road and enter high ground - EPIC!   
However the Old Guard weren't to be left out of the fracas all day. Tony managed to gather four battalions and a big battery to mount an attack through the farmland to assault the village the the Old Guard were sat in smoking pipes and telling tales from the old days. It would never be enough but we had the toys out and they demanded to be played with...
  
The Chasseurs a pied of the Guard march out to meet the Russian attack line. To their left are two further battalions to absorb artillery fire and keep the hovering hussars honest. Their general watches through his telescope from a safe position behind the wall. 

Ball crunchingly brutal charge by the Chasseurs a pied of the Old Guard into Russian line.
The Grenadiers of the Guard nod approvingly from the village square behind.

The offending Russian regiment is scattered causing the whole brigade the stop dead in it's tracks. The attack is over and the town safe from further molestation today. Vive!  
Swiss Tirailleurs moving through farmland.

French voltigeurs sniping at a farmhouse. 

Russian 12lb battery ranges in on French light cavalry as they redeploy to encircle the centre.
Very handsome hussars. Foundry Russians from Tony's stable.
 Note pelisse matching the flowers.

Russian Militia. Note the axes slung from their belts and the blond beards - these are Rus.  

The north end of the plateau. Russian Militia and jaeger engaging Italians and French Legere.
"BEHIND YOU....."    

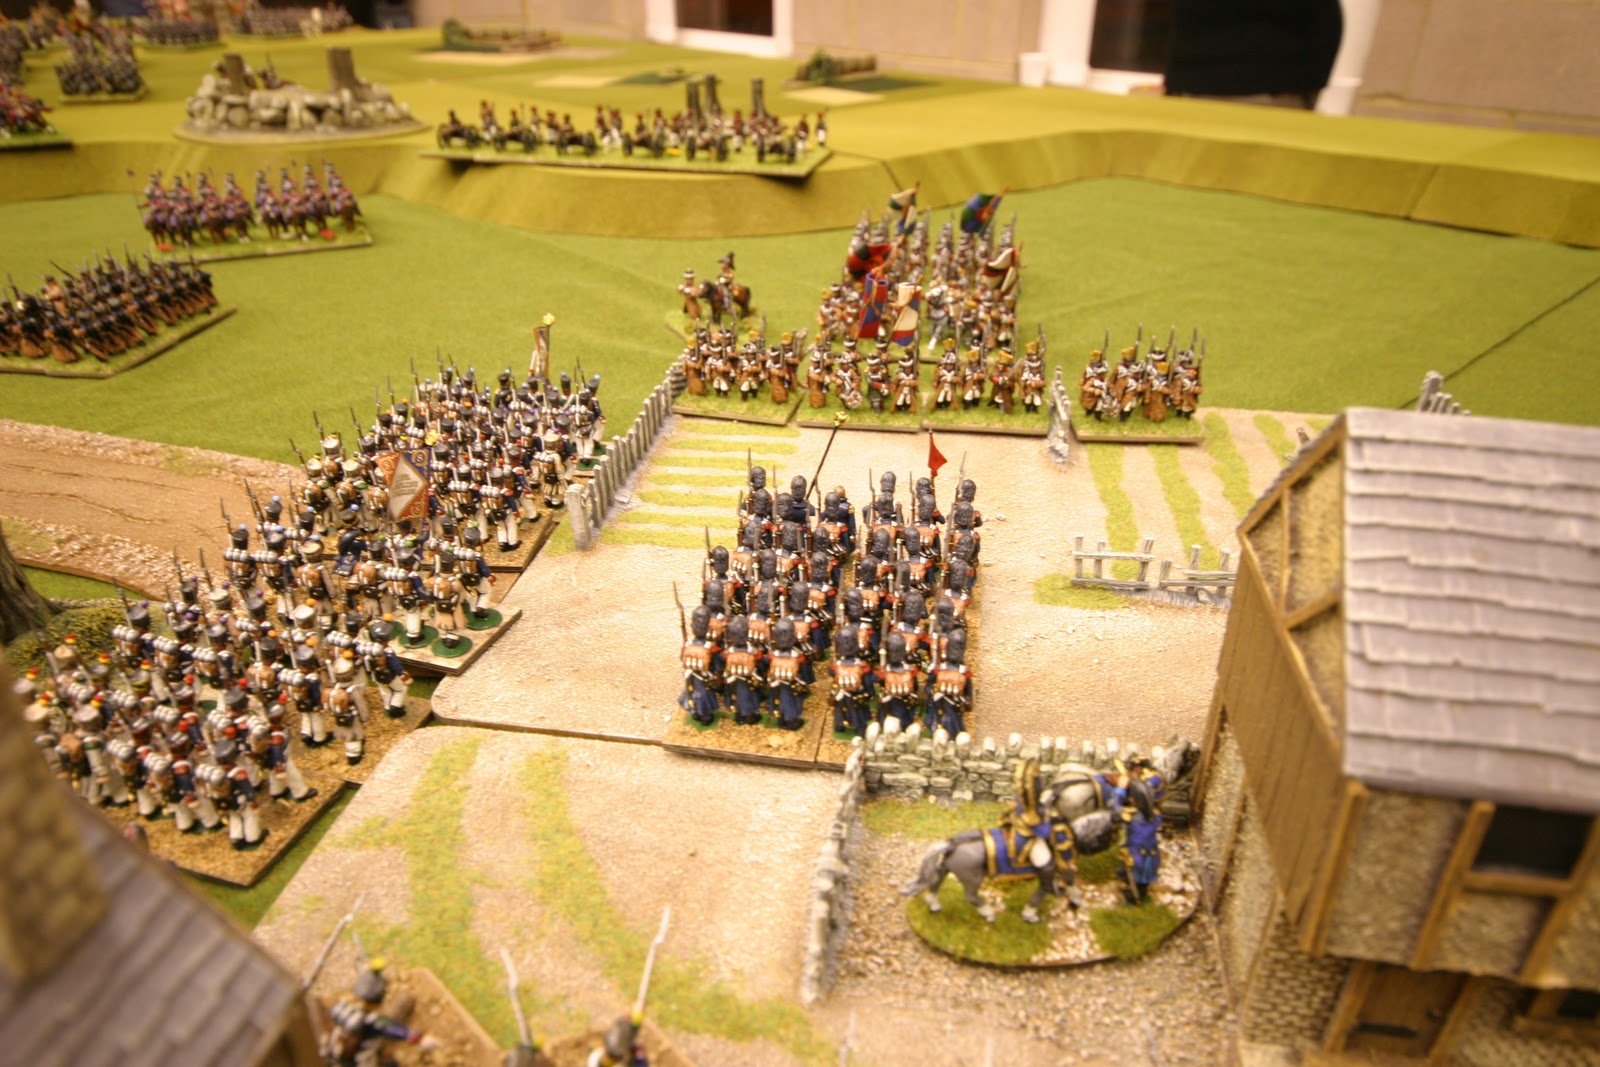
Strelitz recaptured by the Russians as the Bavarians are forced out.
Note The Novgorod stuck in front the squares with nowhere to go.
                          
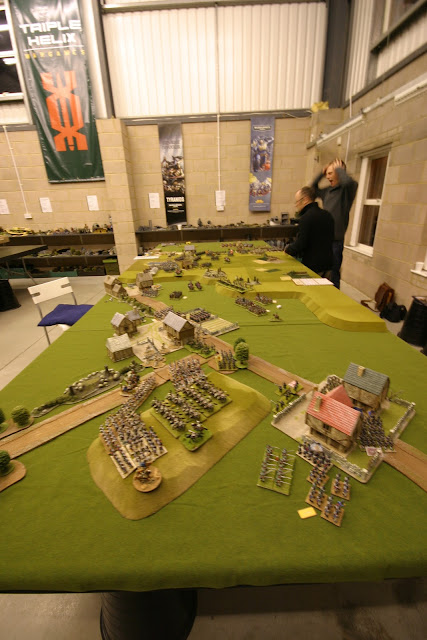
The centre in the final stages.

Looking south as Chris's cavalry columns finally begin to move up onto the high ground to completely encircle the Russian centre covered by the Saxon horse battery. Splendid stuff.

With fighting along the whole line things were getting very tense. Suddenly two things happened in quick succession to end the battle. Firstly the Novgorod broke under the constant close range volley fire and dispersed. Secondly various units in the Russian centre broke. Both precipitated morale tests for nearby units and Brigades. As panic spread through the army the southern flank fell away and the with the last roll of the game - a double one - the centre collapsed too. It was all over. The French had prevailed.

A massively enjoyable game - a real piece of theatre. Thanks to Tony and Chris for playing and to all at Triple Helix for laying on the space for us and opening early.      

C'est la guerre.


A few pretty piccies as out takes, enjoy;


Command element from Chris's Cuirassiers. This 24 strong regiment was his 40th Birthday present from me Rich and Tony. Perry minis painted by Perry Pender, based by myself. Lucky man, I want friends like me. 

Sievers - General of the Russian Cavalry at Strelitz. Foundry conversion by Tony, note the new steel sword.

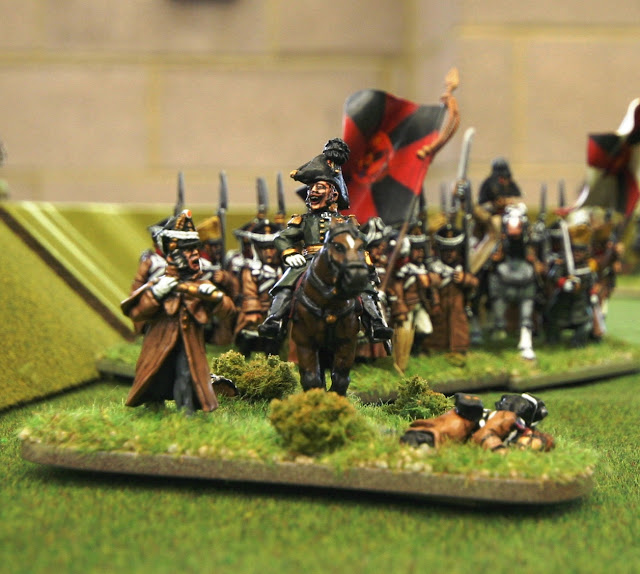
Napoleonic regiments were often led by braying imbeciles like this one.

French skirmishers - Perry plastics.

Russian infantry by Tony - Foundry minis. They are based on kitchen work surface material, hand cut by Tony, machine sanded and then scatter attached  with Aruldite epoxy - estimated half life; 10,000 years. 

To the victor the spoils. Yummy.

"Get down from there before you fall and bloody hurt yourself" 
Thanks for reading this, I hope you enjoy my waffling as much as I do. We are now planning the next few games in a rather novel and clever way in my opinion. But that will have to wait until next time.
Cheers
warpaintjj   

Saturday 7 January 2012

Big Christmas game - The Battle of Strelitz 1813. Part 1.

It's traditional for the Marauders to stage a Christmas game - it's a good opportunity to spend a day together   messing about with toys and have a good laugh. On a more serious note it is also too good an opportunity to leave to chance so plenty of planning is required. This year I undertook that task with some relish. The tables at Triple Helix were booked from 10 am to 10pm 27th December 2011. The previous week Tony and I met at our club and set up the table, our usual 16 x 6 feet. We both drew maps and took lots of piccies to make sure we reset it correctly on the day...

The field from the south west with Bavarian and allied Brigades deploying to
attack  Strelitz on the right. 
We decided that we should use all of my French against a comparable Russian army chosen by Tony from his collection. This amounted to about 20 x 36 battalions of varying grades, circa 20 guns and 6 regiments of cavalry mostly about 24 strong, plus clouds of skirmishers. We kept it sensible as we had to get in and out in 12 hours and get a result. Rich was away on hols so Tony, Chris and I would have to muddle through ourselves.

Looking north east over Strelitz in the foreground. Russians massing in the southern ,
central and northern sectors ready to attack.
In order to help the game along I stipulated that all forces must be deployed on the table from the outset and quite far forward, the Russians about 18 inches on - the French about 12. I also decided every formed infantry unit and every cavalry unit over 20 strong would begin with 1d6 minus 3 casualties on the roster. This turned out to be very effective and something we will repeat. General de Brigade players will soon realise the significance of this...  

Looking north west from behind the northern section of the Russian centre from the plateau towards the plain flooding with French horsemen. Russian cavalry massing on the right. That road was Chris's objective - gulp!

Upon arrival we slapped down the scenery and deployed the armies in accordance with our pre-formulated plans. Here the fog of war crept in. I put down some vital villages in the wrong position by about a foot. Tony took this as an error in the Imperial Russian Topographical Department and just got on with it.
 
What a true gent that man is!  

Russian Uhlans and Dragoons move onto the plains to counter the French cavalry threat to the northern flank.
This would be mega.

The objectives for both sides were the same. Control the two main stretches of road across the board. This gave us all a reason to get stuck in. One ran along the northern end of the plateau at the bottom of the escarpment, the other diagonally across the southern sector between three villages including Strelitz, which lends its name to this fictitious battle.

We also agreed that one couldn't merely sit on the road but had to actually "control it" - that meant thinking about what features overlook it and what stages along the road are important. Victory would be discussed at the end. This may sound arbitrary and woolly, and it is. We are all old enough and ugly enough to do this.

French and German heavies with hussars and Guard Lancers with two horse batteries confront the fewer but much
 larger Russian regiments of Dragoons and Uhlans with their own horse guns.
Both sides decided to deploy substantial cavalry on the northern plain where the level farmland and lack of much woodland or urban terrain lent itself to a BIG hook across the table to capture the far end of the road from each other.   

Saxon elite heavies - the Garde de Corps.
Lithuanian Uhlans from Sievers cavalry. These proved harder than the Guard Lancers EVER imagined.
Seivers "leads" his Dragoons forward to confront the French and German horse on the plain.   
Down south near Strelitz Tony massed a dense block of columns to assault and then hold the village. Opposite a Brigade of Bavarians and Wurtemburgers had the same idea. The Russians got there first as jaegers penetrated the narrow streets and lined the walls to harass the advancing Bavarians. Both sides had supports; the French had another Brigade of four battalions protecting the flank plus a foot battery. The Russians turned up with a regiment of 32 elite Cuirassiers and a horse battery - bollocks.    
 
Superbly painted Russian line regiment in greatcoats. This unit is advancing along the ridgeline on the southern escarpment of the plateau.
The centre was basically up on the plating. This represented an area of raised farmland complete with drainage and irrigation ditches plus two large rocky outcrops to make things interesting. 

Chris and I used the narrow end of this to link our forces - always a vulnerable point. I paced the unreliable Italians here with their 12lb foot battery. One Italian battalion stayed in the village at the foot of the hillside to anchor the position. Chris deployed some of his infantry up here and some on the road in the north. He too had a foot battery. 

Another Battalion in greatcoats moving towards the suburbs of Strelitz. These look like grizzled veterans to me...
Opposite us on the plateau Tony put three Brigades with a two 6 gun 12lb foot batteries. Mercifully they seemed to have objectives which pulled them in intemperate directions; north, south and west. Luckily the boys heading west, ie towards me were militia. Although against my Italians anything could happen.

Frustratingly Tony led his attack here with a few cossacks. Those people are soooooooooo annoying.
He also had some rather fine Hussars here.  

The locals hang out patriotic colours from a bygone age to welcome the liberators. Russian Jaeger and line enter Strelitz .

Russian battalions with divisional cavalry support from these hussars move across the plateau under their general's eye.

The Novgorod Cuirassiers head for the French guns on the high ground overlooking Strelitz as more and more Russian columns press into the town. Really excellent command vignette by Tony. 

Fine and Dandy fellows from Italy. The Milan Civic Guard attack a basket of potatoes and prove victorious.
I need to organise a quiet few nights in just basing these and many others. 

If looks could kill - check out the left hand guy - stare him down if you can.
 Cossacks by Tony, from Front Rank.
Russian heavy metal supports the attack. Note Snapdragon tree stump wood, one of many fine peices around the table.

Oh grief, Duka sends the Novgorod into battle, one of the pivotal actions in the south, for all the wrong reasons!

German allies threaten Strelitz. With the supporting brigade behind this pitted 7 French & allied battalions with artillery support against fewer Russians with only half a horse battery. Should be a walk in the park.
Obviously I hadn't counted on the Novgorod Cuirassiers turning up to play in this sector! 

View from the East of the Russian centre on the plateau. Cavalry action unfolding to the north.  

Russian Dragoons in line.

The Regimental Colonel signals the attack - Urrah!
A splendid sight by Tony, note steel sword.

French and Allied cavalry mix it up in fast moving melee and manoeuvre against their Russian counterparts.

My Polish and Westphalian heavy cavalry command - Regiments almost finished! Both Front Rank.

Nice arse. Guard Lancers from behind. Front Rank toys from my collection.
Not everything went the Frenchies way. The Dutch "Red Lancers" of the Guard dusted off their weapons and decided to show everyone just how this cavalry melee malarchy should be done. They duly chased off into the Lithuanian Uhlans, a humble line cavalry regiment. We hardly dared look as the Russians counter-charged, both sides passed the tests and collided with a cacophony of terrified horses and snapping lances. This was going to be ugly for the Lithuanians - surely. Not so! The plucky Baltic buggers fought like demons - only a draw saved the Guard lancers from being run over! There would be some unflattering press in the morning for them. What would Boney say?      

Brace for impact!

The cavalry battle was everything we had hoped for - very big, very fast moving & very unpredictable. However with almost every contact the Russians were pushed back again and again. A Saxon regiment, Garde de Corps, overthrew Dragoons out numbering them by 2 - 1! With horses blown the Saxons withdrew only for the next regiment, the Saxon von Zastrow Cuirassiers, to step up and carry on the attack; not letting the Russians pause for breath or regroup.  

Saxon Garde de Corps charging Russian Dragoons. Perry toys from my collection.

Russian Dragoons charge Saxon Garde de Corps. Foundry by Tony.  

Everyone is sent forward to swing the tide - properly based or not.

9th Hussars with staff officer - from my stable. 

New arrivals. The 5th Hussars painted for me by Tony Lawton of the Generals Bivouac. Perry plastics.
I still need to finish the horses and base these. 

Elite company troopers of the 5th Hussars, details as above.

Saxon heavy cavalry generals by Front Rank. Painted by Perry Pender, based by me for me. 

Saxon Horse artillery support the Heavy cavalry attack. A really busy & beautifully painted battery.  

Close up of the same battery, one of my faves.

The Russians brought along Horse artillery as well. These are Elite Miniatures painted by Pete Morbey of Elite.
Based by Tony. 

5th and 9th Hussars trotting forward. Again I need to finish basing these. 

Finally only one Russian Regiment remained to stem the tide. Literally all others were overwhelmed and scattered.
French and Saxon Cuirassiers bare down on them with artillery support.   
As I take a break from this report here is the vital situation in the north. The Russian cavalry are spent and put to flight. The French and their allies have suffered very few casualties comparatively. Now they must consolidate this success; regroup and take the end of the road. If unchecked they could encircle the whole Russian centre with 6 regiments of cavalry and two horse batteries. Well played Chris - it really as a sight to behold. Tactical genius? Nah! Jammy as usual.

Better call back to see what unfolded next.